Every old house comes with a list. You know the one: lead paint, asbestos, drafty windows, damp corners, cracked plaster, questionable wiring, that one outlet that sparked when you plugged in the vacuum.
The list grows faster than you can cross things off. And if you’re like most families, you end up doing one of two things: either you ignore everything until something breaks, or you try to fix everything at once and go broke.
There’s a better way.
After years of inspections and living in our own 1948 house, I’ve boiled old‑house risk management down to three simple verbs: Seal it. Remove it. Or monitor it.
That’s it. Every problem you face fits into one of these three buckets. Once you sort them, you stop feeling overwhelmed and start knowing exactly what to do next.
Let me walk you through each one.
Seal It: The first and often best option
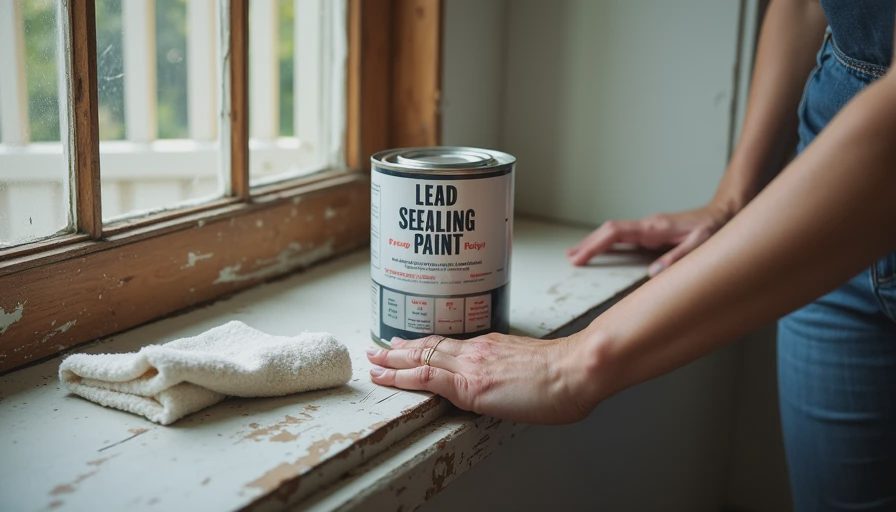
Most old‑house hazards don’t need to be removed. They just need to be sealed, covered, or encapsulated so they can’t hurt anyone.
What “seal it” means: You put a barrier between the hazard and your family. You don’t eliminate the problem. You make it harmless.
When to choose “seal it”:
The hazard is stable (not crumbling, not actively deteriorating)
It’s not on a friction or impact surface
You don’t need to disturb it for other work
Sealing is cheaper and safer than removal
Real examples from our house and others:
Hazard | How to seal it | Cost | Time |
|---|---|---|---|
Intact lead paint on a wall | Paint over it with regular latex | $50 | 1 day |
Intact lead paint on a window sill (no chips) | Encapsulation paint (special thick paint) | $30 | 2 hours |
Deteriorating lead paint on a baseboard (child can reach) | Cover with contact paper or clear tape (temporary), then encapsulation paint | $10 | 1 hour |
Asbestos floor tiles (9×9, intact) | Cover with new floating floor, vinyl, or carpet | $200‑500 per room | Weekend |
Asbestos pipe wrap (intact, not crumbling) | Wrap with fabric encapsulation or spray with sealant (pro job) | $500‑1,000 | Pro |
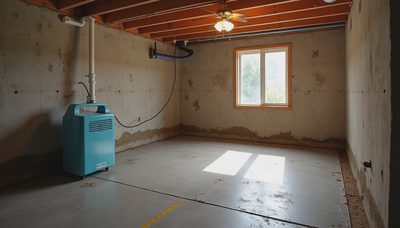
Damp basement corner (no standing water) | Fix gutters, extend downspouts, add dehumidifier | $200 | Weekend |
Drafty window (old, but not rotting) | Rope caulk + shrink film + heavy curtains | $30 | 1 hour |
Cold attic air leaking into bedroom | Add blown‑in insulation over the ceiling | $1,000‑1,500 | Weekend |
The big advantage of sealing: You keep the original materials in place. No demolition. No dust. No risk of releasing fibers or lead dust. And it’s almost always cheaper.
When sealing is not enough: If the material is already crumbling, or if it’s on a friction surface (windows that open, doors that rub), sealing alone may not work because the friction will wear through the seal. In those cases, you move to “remove it.”
Remove It: When the hazard can’t be safely contained

Removal is expensive, messy, and risky if done wrong. But sometimes it’s the right answer.
What “remove it” means: You take the hazardous material out of your house entirely. No more monitoring, no more worrying. It’s gone.
When to choose “remove it”:
The material is already deteriorating, crumbling, or shedding fibers/dust
It’s on a friction surface (window jambs, door frames) and sealing keeps failing
You need to disturb it for a renovation anyway
You have young children who are at high risk and you want zero exposure
The material is in a location you use constantly (e.g., a playroom baseboard)
Real examples where removal makes sense:
Hazard | Removal method | Typical cost | Who does it |
|---|---|---|---|
Lead‑painted window sash (friction surface) | Replace the sash or window | $200‑500 per window | Carpenter or window company |
Crumbling asbestos pipe wrap | Professional abatement | $2,000‑5,000 | Licensed asbestos contractor |
Water‑damaged, moldy drywall in a kid’s room | Cut out and replace (with containment) | $500‑1,000 | Handyman or DIY (with precautions) |
Loose, peeling lead paint on a stair railing | Chemical stripping (wet method) or replacement | $100‑300 | DIY (with proper training) or pro |
Asbestos popcorn ceiling (crumbling, or you want to remove it) | Wet scraping + HEPA vacuum + disposal (licensed pro required in many states) | $5,000‑15,000 | Asbestos abatement contractor |
The big risk of removal: Disturbing the material can make the hazard worse if not done correctly. Dry sanding lead paint creates toxic dust. Breaking asbestos pipe wrap releases fibers into your whole house.
Rule of thumb: If you can seal it safely, seal it. Only remove when sealing isn’t possible or the material is already failing.
When you must hire a pro: Asbestos removal (in most states), lead paint removal on large areas (over 6 square feet), any work that requires a HEPA negative air machine. Don’t DIY these unless you’ve had specific training.
Monitor It: The option most homeowners forget

This is the most underrated tool in old‑house risk management. You don’t have to fix everything. Some things just need to be watched.
What “monitor it” means: You assess the hazard, decide it’s not urgent, and set a schedule to check it regularly. If it gets worse, you escalate to “seal it” or “remove it.” If it stays the same, you keep living your life.
When to choose “monitor it”:
The hazard is stable and not causing any immediate problem
It’s in a low‑traffic area or out of reach of children
You have higher priorities right now
Fixing it would require major work, and you’d rather save up
Real examples of “monitor it” in action:
Situation | Why monitor | What to check | How often |
|---|---|---|---|
Hairline crack in basement wall (no water, no movement) | Most likely harmless | Width, length, water stains | Every 6 months |
Intact lead paint on a high wall (above 5 feet) | No one touches it | Any new chips from settling | Yearly |
Asbestos pipe wrap in an unused crawlspace | No one goes in there | Signs of damage, water leaks | Yearly |
Old water stain on ceiling (dry, not growing) | Probably an old leak fixed long ago | Any darkening, softness, or new stain | Every 6 months |
Slightly loose stair newel post (no wobble yet) | Not a fall risk currently | Wobble, movement at base | Monthly |
A bedroom that’s 2‑3 degrees colder than the rest | Annoying but harmless | Temperature difference, signs of mold | Seasonal |
How to monitor like a pro:
Take photos with your phone. Put them in a folder named by room and date.
Use a permanent marker to trace a crack’s ends. If the crack grows past the mark, it’s moving.
Keep a simple log: “Dec 2025 – basement crack still 1/16”, no water.”
Set calendar reminders every 6 months.
When to stop monitoring and act: If you see change. A crack that grows. A stain that darkens. A wobble that becomes a sway. A cold room that gets colder. That’s your signal to move from “monitor” to “seal” or “remove.”
A real‑life decision walkthrough
Let me take you through a typical call I had last year.
The situation: A family with a 2‑year‑old and a 6‑month‑old. Their 1920s house has:
Peeling paint on the living room window sill (child height)
Intact lead paint on the dining room walls (above 4 feet)
A damp crawlspace with no vapor barrier
Asbestos floor tiles in the basement (intact, not crumbling)
A slightly drafty front door
Step 1: Sort into buckets
Problem | Bucket |
|---|---|
Peeling paint on window sill (child reach, friction surface) | Remove it (or replace sash) |
Intact lead paint on dining room walls (high, stable) | Monitor it (check yearly) |
Damp crawlspace (no active leak, just high humidity) | Seal it (vapor barrier) |
Asbestos floor tiles in basement (intact, no traffic) | Seal it (cover with new floor) |
Drafty front door (annoying but not an emergency) | Monitor it (fix later) |
Step 2: Prioritize by risk and cost
The peeling window sill is the highest risk because a toddler can reach it and the friction from opening the window releases dust. That goes to the top. They sealed it temporarily with tape, then budgeted $500 to have a carpenter replace just that window sash (removal, not full window replacement).
The damp crawlspace was next. They put down a vapor barrier themselves for $300. That stopped the musty smell and made the first floor warmer.
The asbestos tiles they covered with a floating floor ($400). Done.
The dining room walls? They monitor them. No action needed.
Total cost: About $1,200. Total panic: zero.
The one‑page cheat sheet
SEAL IT (cheap, safe, DIY‑friendly)
Intact lead paint → paint over it
Stable asbestos floor tiles → cover with new flooring
Damp basement → fix gutters, run dehumidifier
Drafty window → rope caulk + shrink film
Cold attic → add blown insulation
Loose outlet (electrical) → tighten or replace (turn off power first)
REMOVE IT (costs more, sometimes hire a pro)
Peeling lead paint on window sash → replace sash
Crumbling asbestos pipe wrap → pro abatement
Rotting wood sill plate → pro repair
Moldy drywall → cut out and replace
Wobbly staircase railing → remove and remount properly
MONITOR IT (free, just be observant)
Hairline crack in foundation → trace ends, check every 6 months
Old water stain (dry) → check for growth yearly
Slightly loose newel post → test monthly
Intact lead paint out of child’s reach → inspect yearly
A door that sticks in summer but not winter → note the pattern
What we monitor, seal, and remove in our house
Since you asked (and since honesty is the point of this blog), here’s our current status:
Sealed:
Lead paint on Elsie’s window sill (encapsulation paint)
Damp corner in basement (fixed gutter, added dehumidifier)
Drafty living room window (rope caulk + thermal curtains)
Removed:
Old boiler with asbestos blanket wrap (previous owner did it — thank you)
Peeling lead paint on the back porch stair railing (wet‑stripped and repainted)
Monitored:
Hairline crack in the foundation (no change in 4 years)
Asbestos cement panel behind electrical panel (still intact, no one touches it)
The original 1948 windows (they’re drafty but not rotting; we monitor each fall)
No house is perfect. Ours isn’t. But we know exactly which problems are real, which ones can wait, and which ones are already handled.
That’s the peace of mind you’re actually looking for.
No feedback yet — submit the first.