Every October, I do the same thing.
I grab a long‑sleeve shirt, a cup of coffee, and a roll of painter’s tape. Then I walk through our 1948 house and find every place where winter is trying to get in before it actually arrives.
Megan used to laugh at me. “You’re chasing drafts again?”
Now she just hands me the tape. Because she’s noticed: the years I do this, the house is warmer, the heating bill is lower, and nobody’s complaining about a cold shoulder from the window by the couch.
You don’t need a thermal camera. You don’t need a blower door test. You need one weekend, a few cheap tools, and a system.
Here’s mine.

What you’ll need (total under $30 if you already own a candle)
Your hand (seriously)
A stick of incense or a candle (the smoke shows air movement)
Painter’s tape (to mark leaky spots)
A small notepad or your phone’s notes app
Optional but nice: a roll of rope caulk, foam outlet gaskets, a tube of caulk, and a can of spray foam
That’s it. No power tools. No ladder (unless you want to check the attic hatch). Just one patient weekend.
Saturday morning: Start on the main floor
Pick a day when the wind is blowing. Wind makes leaks obvious.
Step 1: Close all the windows and exterior doors. Turn off your furnace or any fans. You want the house still, so any moving air is coming from outside.
Step 2: Walk room by room. Start at the far end of the house and work your way toward the front door.
What to check:
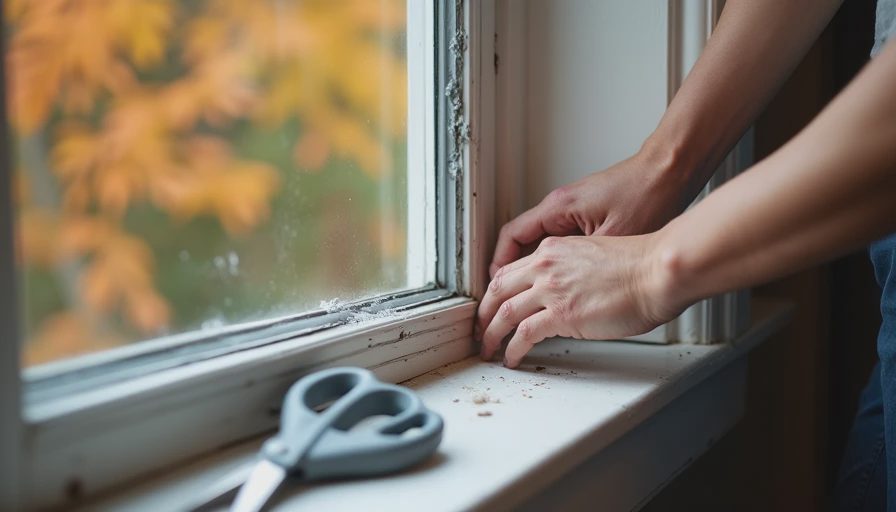
Windows: Run your hand around the edges of the sash, where the window meets the frame, and along the bottom sill. Feel cold air? Mark the spot with a small piece of painter’s tape. Write “W” on it so you remember it’s a window leak.
Doors: Check all four sides of every exterior door. Pay special attention to the bottom (door sweep) and the hinges (a common gap). Mark with “D.”
Baseboards on exterior walls: Run your hand along the baseboard where it meets the floor. Cold air often comes up behind the baseboard through the wall cavity. Mark with “BB.”
Electrical outlets and light switches: These are sneaky. Put your hand near an outlet on an exterior wall. Feel a chill? That’s cold air coming in through the wall cavity and out around the outlet. Mark with “O.”
Window trim: Feel the gap between the trim and the wall. That’s another hidden path for cold air. Mark with “WT.”
Step 3: Use smoke for the invisible leaks. Light your incense or candle. Hold the smoking end near each suspect spot. If the smoke wavers, blows sideways, or gets sucked into a gap, you’ve found a leak. Mark it.
By lunchtime on Saturday, your house will look like it has a bad case of tape‑pox. That’s good. That’s your map.
Saturday afternoon: The basement and attic
The biggest air leaks are often where you don’t live — the basement and attic.
Start in the basement (or crawlspace).
Rim joist area: That’s where the basement wall meets the floor joists above. Run your hand along the rim joist. Feel cold air? You’ll almost always find it. Mark with “RJ.”
Around pipes and wires: Wherever a pipe or wire goes up through the subfloor into the first floor, there’s usually a gap. Put your hand there. Mark with “P.”
Basement door or bulkhead: If you have a door from the basement to the outside, check it like any exterior door. Mark with “BD.”
Ductwork: If you have forced air, put your hand near any duct joint or where a duct goes into a floor register. Leaky ducts suck in cold basement air and blow it upstairs. Mark with “DCT.”
Now go to the attic.
Attic hatch or pull‑down stairs: This is almost always a giant hole in your thermal envelope. Put your hand around the edges of the hatch. Feel cold air pouring in? Mark it. (This is cold from the attic coming down into your house — same problem.)
Chimney chase: Where the chimney passes through the attic floor, there’s often a big gap. Mark with “CH.”
Plumbing stack: The big pipe that goes up through the roof. Gap around it? Mark with “PS.”
Recessed lights (if any): Old can lights are notorious for leaking air into the attic. Don’t put your hand on a hot light, but on a cool day, feel around the trim. Mark with “RL.”
By the end of Saturday, you have a complete list. Don’t fix anything yet. Just find and mark.
Sunday morning: Prioritize and fix the easy ones

Now you look at your tape marks and decide what to do first.
Tier 1 (cheapest, fastest, biggest impact):
Outlet gaskets ($10): For every “O” mark, buy a pack of foam outlet gaskets. Turn off the power at the breaker (test with a lamp). Remove the outlet cover, place the gasket over the outlet, replace the cover. Five minutes each. Huge difference.
Rope caulk for windows ($5‑10 per window): For “W” marks on the movable sash, press rope caulk into the gap between the sash and the frame. It’s like modeling clay. Press it in, smooth it. In spring, it peels right off. You’ll feel the difference immediately.
Weatherstripping for doors ($15‑30): For “D” marks, add or replace the weatherstripping on the door jamb. If the gap is at the bottom, install a new door sweep. Every hardware store sells kits.
Caulk around window trim and baseboards ($10): For “WT” and “BB” marks, run a thin bead of paintable latex caulk along the gap. This stops air coming from behind the trim. Let it dry, then you can paint over it if you care about looks.
Do all of these on Sunday morning. Total cost under $100. Total time: 2‑4 hours depending on how many marks you have.
Tier 2 (a little more work, still weekend‑doable):
Spray foam the rim joist ($50‑100 for a few cans + a foam gun): For “RJ” marks in the basement, seal the gap between the rim joist and the foundation with spray foam. Wear gloves. Fill, don’t overfill. Let it cure. This is a bit messy but incredibly effective. If you have a large rim joist area, consider buying a froth pack (two‑part foam) for $300‑500 — still a weekend project.
Seal the attic hatch ($30): For “AH” marks, add foam weatherstripping to the hatch door itself, then glue rigid foam insulation (foam board) to the back of the hatch. Use a latch or hook to pull the hatch tight against the weatherstripping.
Seal pipe and wire penetrations ($10‑20 for a can of spray foam): For “P” marks in the basement or “PS” marks in the attic, spray foam the gap around the pipe. Don’t spray foam around a hot chimney flue (use metal flashing and high‑temp caulk instead).
Tier 3 (good, but can wait or hire out):
Duct sealing ($50 in mastic + a brush): For “DCT” marks, buy a tub of duct mastic. Brush it over every seam and joint in your exposed ductwork. Not the sticky tape — mastic. It dries hard and stays sealed.
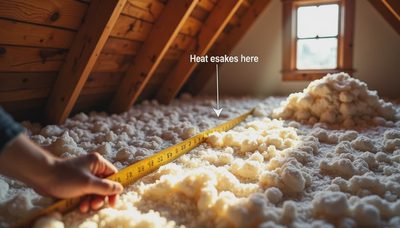
Attic insulation ($1,000‑1,500 DIY): If you found “RL” marks or just general cold rooms, rent a blower and add blown‑in insulation to your attic floor. Do this after you’ve air‑sealed the attic floor (sealing those same gaps). This is a bigger project, but one weekend can transform your house.
Sunday afternoon: Test your work
Once you’ve made the fixes, go back to every piece of painter’s tape. Do the hand test again. Light your incense. Is the draft gone?
If yes, pull off the tape (or replace it with a cleaner piece if you want to keep monitoring). If not, add a second layer of fix or mark it for a professional later.
By Sunday evening, your house should feel different. Not “perfect” — that’s not the goal. But noticeably less drafty. The room by the window won’t make you shiver. The outlet on the north wall won’t whistle.
What I do in our house every fall
I have a ritual. The first windy Saturday in October, I do this whole routine. It takes me about half a day now because I’ve already sealed the major leaks over the years.
This past fall, I found three new ones:
The basement bulkhead door had shifted and left a 1/4″ gap. I added a new sweep. Fixed.
A window in Elsie’s room that we never open had rope caulk that dried out. Replaced it. Fixed.
The attic pull‑down stairs — I’d neglected for two years. Added foam board and weatherstripping. Fixed.
Total cost: $45. Total time: 3 hours. That evening, Megan said, “Did you turn up the heat? It feels warmer in here.”
I hadn’t. The thermostat was still at 68. The house was just leaking less.
When to call in a pro
If you do this weekend and you still have cold rooms, or you see your tape marks but can’t figure out how to seal them, consider a home energy audit.
For $300‑500, a pro with a blower door and thermal camera will find leaks you never imagined. They’ll give you a prioritized list. Many utility companies offer rebates or even free audits.
But start with your hand, a stick of incense, and a roll of painter’s tape. You’ll solve 80% of the problem before you ever pick up the phone.

No feedback yet — submit the first.