The email came with a photo attached. A beautiful living room, except for the floor: dark, cupped planks that looked like tiny canoes. Gaps between the boards wide enough to drop a nickel into.
“Grant, we’ve been saving for two years to replace this floor. It’s only seven years old. The contractor says the wood was defective. But we think something else is going on. What do you see?”
I opened the photo and zoomed in. The cupping was consistent across the whole room, not in isolated patches. That told me the problem wasn’t the wood. It wasn’t the installation. It was the environment under the floor.
I drove out to their 1970s split‑level on a damp October morning. The house was well kept. The family had two young kids. The wife pointed at the floor and said, “We wanted engineered hardwood because it’s supposed to be stable. Now it looks like this.”
I knelt down. Ran my hand across the cupped boards. Then I walked to the basement stairs and asked, “Can I see what’s underneath this room?”
Ten minutes later, I had the answer. They didn’t need new floors. They needed a moisture plan.
What I found under their living room

The room with the cupped floor sat directly above a crawlspace. Not a basement — a shallow, dirt‑floor crawlspace with no vapor barrier. The dirt was dark and damp to the touch. The air in the crawlspace felt like a wet cave.
I shined my light up at the subfloor. The underside of the plywood was dark with moisture staining. A humidity meter I placed in the crawlspace read 85%. In the living room, the relative humidity was 70%.
The engineered wood floor was absorbing moisture from below. The bottom of each plank swelled, forcing the edges up into a cup shape. The floor wasn’t defective. It was drowning.
The family had spent $8,000 on that floor seven years ago. Now they were ready to spend another $10,000 to replace it. If they did that without fixing the crawlspace, the new floor would look exactly the same in two years.
I sat down at their kitchen table and sketched out a different plan.
The moisture plan I gave them
Step 1: Stop the source (under $500, one weekend)
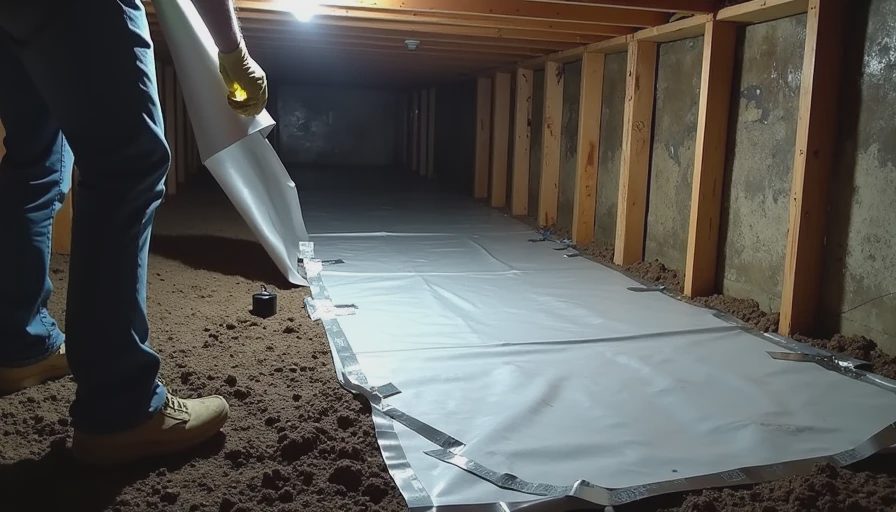
The dirt crawlspace was the main problem. Soil moisture evaporates 24/7. That vapor rises, hits the cold subfloor, and condenses into liquid water inside the wood.
Install a 10‑mil polyethylene vapor barrier over the entire crawlspace floor. Overlap seams by 12 inches and seal with vapor barrier tape. Run the plastic up the foundation walls at least 6 inches and tape or glue it in place.
Seal the crawlspace vents (if local code allows) to keep outdoor humid air out. In a humid climate, venting a crawlspace actually makes it wetter.
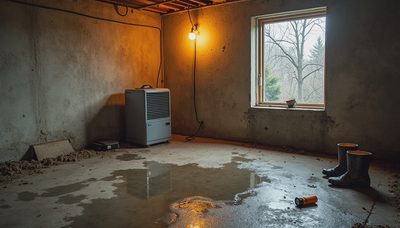
Add a crawlspace dehumidifier if the space remains above 60% humidity after the barrier is down.
Cost for a typical crawlspace: $300‑500 in materials. The family did it themselves over a weekend.
Step 2: Condition the crawlspace (optional, but powerful)
Instead of leaving the crawlspace as a dirty, damp hole, they turned it into a mini‑basement. They added rigid foam insulation to the crawlspace walls, sealed the vents, and ran a small dehumidifier set to 55%.
Now the crawlspace was no longer pulling moisture from the soil and pushing it into the living room. It was dry, clean, and barely noticeable.
Step 3: Let the old floor dry before deciding
They wanted to rip out the cupped floor immediately. I asked them to wait six months. After the crawlspace work, the humidity under the house dropped from 85% to 55%. The engineered wood floor began to flatten. Not completely — some boards stayed cupped — but enough that they could live with it.
They decided to keep the floor. No replacement. No $10,000. Just a moisture plan that cost $1,200 and a few weekends.
Why this happens in so many old houses
Old houses were built before anyone understood vapor barriers. Crawlspaces were left open to the soil. Basements were leaky and damp. Builders assumed the house would “breathe.”
But wood floors don’t like to breathe. They like stable humidity. Engineered wood is more stable than solid hardwood, but it’s not invincible. When the relative humidity under the floor stays above 70% for months, the wood absorbs moisture, expands, and cups.
Common floor problems that are really moisture problems:
What you see | What’s actually happening | Real fix |
|---|---|---|
Cupping (edges high, center low) | Bottom of plank is wetter than top | Fix crawlspace/basement humidity |
Crowning (center high, edges low) | Floor got wet, then dried too fast on top | Same moisture imbalance |
Gaps between boards in winter | Wood shrank in dry heat — normal, but excessive gaps mean summer humidity was too high | Stabilize humidity year‑round |
Black or white mold on floor edges | Persistent high humidity under floor | Vapor barrier + dehumidifier |
Soft, spongy feel | Subfloor rot from below | Open the floor, replace subfloor, then fix moisture |
The test you can do right now
Before you spend money on new floors, do this:
Tape a 12″×12″ piece of clear plastic sheeting to your concrete basement floor or crawlspace dirt. Seal all four edges with duct tape. Leave it for 48 hours.
If water droplets form on the underside of the plastic, moisture is rising through the concrete or soil. You need a vapor barrier.
If the plastic is dry but the area feels damp, run a dehumidifier for a week and test again.
Then, buy a $20 humidity meter (hygrometer). Place it in your basement or crawlspace. Check it morning and evening for a week. If it stays above 65%, you have a moisture problem that will damage any wood floor above it.
What they did wrong the first time

The family had hired a flooring contractor to install the engineered wood. The contractor did a beautiful job. But he never went into the crawlspace. He never tested humidity. He never asked about the dirt floor or the vents.
That’s not unusual. Flooring contractors sell floors. They don’t sell crawlspace vapor barriers. It’s not their job. But it should be your job, as a homeowner, to understand what’s under your floor before you cover it up.
Before any floor installation, ask these three questions:
Is there a vapor barrier over all exposed soil in the crawlspace?
Is the basement or crawlspace humidity below 60%?
Has a moisture test been done on the concrete slab (if you have a slab)?
If the answer to any of these is “I don’t know,” stop. Find out first.
What I’ve learned from our own floors
Our 1948 house has a basement, not a crawlspace. When we moved in, the basement was damp. The first floor had old oak strip flooring that was cupped in places. I assumed it was just character.
Then I learned about moisture. I sealed the rim joist, added a dehumidifier, and fixed a downspout that was dumping water against the foundation. Within a year, the cupping in the oak floors had noticeably reduced. Not perfect — but I didn’t need to replace the floors. I needed to change the environment under them.
We still have that same oak floor. It’s not flat like a new floor. But it’s stable, it’s dry, and it holds a finish. And I didn’t spend $10,000 learning the hard way.
When you actually need new floors
A moisture plan doesn’t fix everything. Sometimes the floor is too damaged. Sometimes the subfloor is rotten. Sometimes the wood is just worn out.
Get new floors if:
The subfloor is soft or crumbling (push a screwdriver into it — if it goes in easily, replace)
The floor has been wet so long that mold has penetrated deep into the wood (surface mold cleans up; deep black staining means replace)
The cupping or crowning is so severe that you can’t walk comfortably or furniture rocks
But before you install new floors, do the moisture plan anyway. Otherwise you’ll be replacing them again in a few years.

No feedback yet — submit the first.