If your basement feels cold and damp every winter, you may be tempted to slap some fiberglass batts between the studs and call it done. But building science basement insulation is more than just stuffing something fluffy into the walls. It is about understanding how heat, moisture, and air move through your home—and making decisions that keep your family safe and your energy bills under control.
I have seen too many homeowners throw money at insulation without addressing the real problem. A wet basement will ruin even the best foam board. And the wrong vapor barrier can trap moisture against your foundation, leading to rot and mold. That is why I want to walk you through the basics of building science basement insulation—what works, what does not, and where to start.
What Is Building Science Basement Insulation?
Building science basement insulation means treating your basement as part of a whole-house system. Instead of thinking about insulation in isolation, you consider air leakage, moisture migration, and thermal performance together. The goal is to create a continuous thermal barrier that stops heat from escaping while also preventing condensation inside your walls.
In older homes, basements are often uninsulated or poorly insulated. The concrete or block walls are cold in winter and sweat in summer. If you add insulation without addressing moisture, you risk trapping water behind the insulation, which feeds mold and damages framing. That is why building science basement insulation always starts with moisture control.
Moisture First: Why Drying the Basement Comes Before Insulating
Before you buy a single sheet of foam, you need to make sure your basement is dry. That means fixing gutters, extending downspouts away from the foundation, grading the soil so water drains away from the house, and installing a sump pump if you have water intrusion. A damp basement is a mold factory. Insulating it while it is wet is like wrapping a wet towel in a plastic bag.
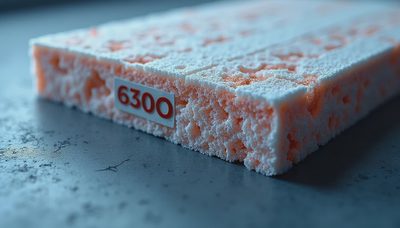
Once the basement is dry, you can think about building science basement insulation. The most common approach for concrete walls is to use rigid foam board (XPS or EPS) directly against the wall, sealed at the seams with tape or canned foam. This provides a continuous layer of insulation and a vapor barrier in one step.

Choosing the Right Materials for Your Climate
In cold climates like the Northeast and Midwest, the key is to keep the warm, moist indoor air from reaching the cold concrete surface. Rigid foam with a taped seam does that. It also has enough R-value per inch to meet code in most areas. For a 2x4 framed wall, you can use 2 inches of foam on the concrete, then fill the cavity with fiberglass or mineral wool, and cover with drywall.
Another option is closed-cell spray foam. It provides a high R-value and acts as both insulation and air barrier. But it is expensive and must be installed by a professional. If you are on a budget, rigid foam is the way to go. Just avoid old-school fiberglass batts placed directly against concrete—they will get damp, sag, and lose R-value over time.
Air Sealing and Vapor Barriers: The Unseen Half of the Job
Building science basement insulation is not complete without air sealing. Even small gaps around pipes, wires, and rim joists can let in drafts and allow moisture-laden air to condense on cold surfaces. Use caulk, expanding foam, or weatherstripping to seal every penetration. Pay special attention to the rim joist area—that is where the floor framing meets the foundation. It is often a major source of heat loss and air leakage.
Vapor barrier placement matters too. In most of the US, a Class II vapor retarder (like kraft-faced fiberglass or a vapor retarder paint) is recommended on the warm side of the insulation. For basements, that usually means the interior side. But if you use rigid foam directly against the concrete, the foam itself acts as the vapor barrier. Do not add another vapor barrier on top, or you could create a double-vapor barrier that traps moisture.

When to Call a Pro vs. DIY
Some parts of building science basement insulation are DIY-friendly. Sealing gaps, installing rigid foam panels, and adding weatherstripping are within reach of a handy homeowner. But if you have persistent moisture problems, structural issues, or want spray foam, hire a professional. A building science consultant or a contractor who understands moisture dynamics can save you from costly mistakes.
I recommend getting a thermal imaging inspection before you start. It shows where cold spots and air leaks are hiding. That way, you target your money where it makes the biggest difference—not just everywhere.
The Bottom Line: A Drier, Warmer, Healthier Basement
Building science basement insulation is not a glamorous renovation. But it is one of the most impactful upgrades you can make for comfort, energy savings, and indoor air quality. Start with moisture control, choose the right materials for your climate, seal everything, and do not rush the process.
Remember: you do not need a perfect house. You need a house that is safe, dry, and honest. A well-insulated basement gets you one step closer.



No feedback yet — submit the first.