
If you live in an older home like mine, you've probably realized that buying a standard door off the shelf is nearly impossible. That's why understanding how to make an exterior door yourself can save you money and ensure a perfect fit. Old houses have openings that settled over decades, so a custom-built door seals better and looks right. Plus, you control the materials and insulation, which means lower heating bills and a safer entry for your family. Let's walk through the process step by step.
Why Build Your Own Exterior Door?
Most modern doors are designed for new construction with uniform rough openings. In a house built before 1980, the framing is rarely square. I've measured openings that are 35½ inches wide on one side and 36⅛ on the other. A stock door leaves gaps that waste energy and let in drafts. When you learn how to make an exterior door, you can match the exact dimensions, add thick weatherstripping, and choose wood that complements your home's style. It's also easier to upgrade the core with rigid foam insulation for better R-value.
How to Make an Exterior Door: The Essential Steps
Here’s how to build a solid exterior door from scratch. The process works for both front and back doors.
**1. Measure the opening.** Remove the old door and jamb. Measure the width and height at three points—top, middle, bottom—and use the smallest dimension. Account for a 1/8-inch gap on each side for shimming.
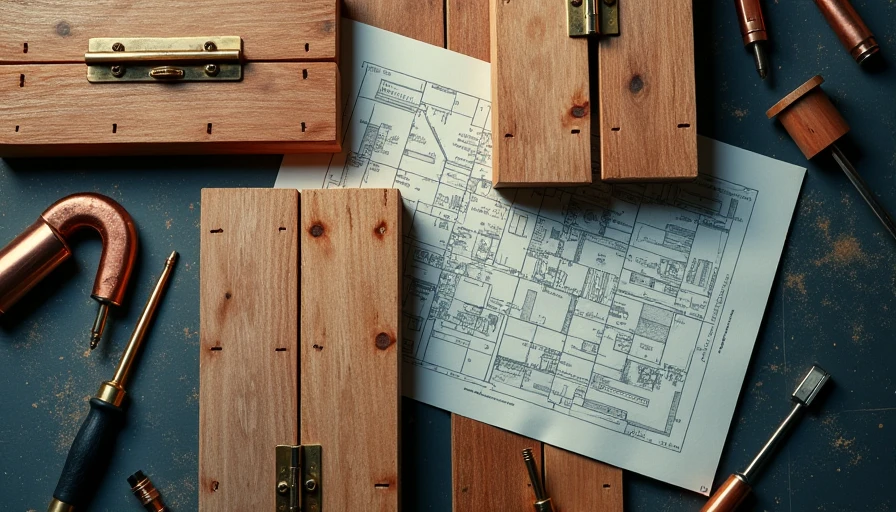
**2. Choose your material.** For old houses, I recommend 1¾-inch thick solid wood like fir or mahogany. They hold up to weather and accept paint or stain well. For better insulation, build a stile-and-rail frame with a plywood panel core, then add a layer of 1-inch rigid foam between the panels.
**3. Build the frame.** Cut the stiles (vertical pieces) and rails (horizontal pieces) to size. Use mortise-and-tenon joints or pocket screws for strength. Assemble the frame on a flat surface and check for square.
**4. Cut and fit the panels.** If you're using raised panels, cut the tongue-and-groove edges and dry-fit them into the frame. For a flat panel door, cut plywood to size and glue it into the frame. Leave a 1/8-inch expansion gap.
**5. Assemble and glue.** Apply wood glue to all joints, clamp, and check square again. Let it cure for 24 hours. Then sand everything smooth with 120-grit paper.
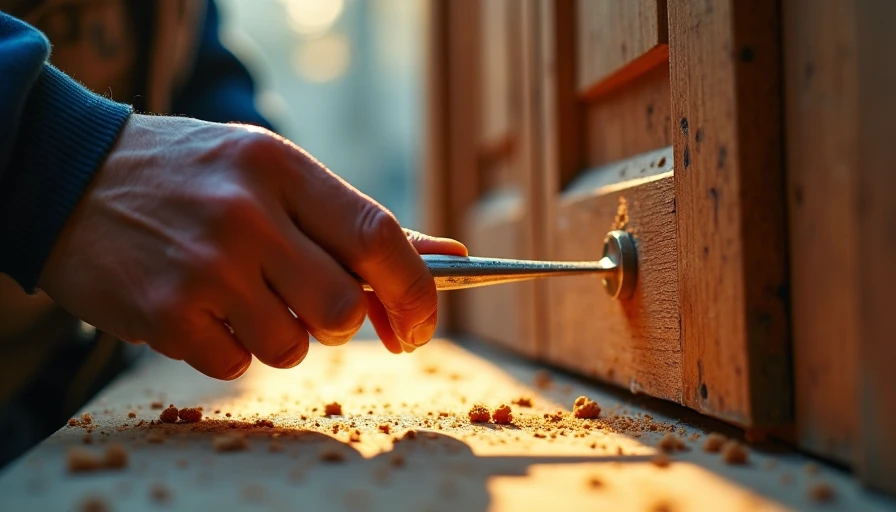
**6. Add weatherstripping and hardware.** Rout for hinges and a lockset. Install a threshold with a compression seal at the bottom. Add magnetic weatherstripping on the sides and top.
Tools You'll Need to Make an Exterior Door
You don't need a full shop. A circular saw, a router, a drill, bar clamps, and a square will get it done. A table saw makes panel cutting easier, but a circular saw with a guide works fine. For insulation, a utility knife and foam board are enough. If you're nervous about the joinery, I've seen excellent results using pocket screws—they're strong and beginner-friendly. Learning how to make an exterior door doesn't require fancy equipment, just patience and careful measurement.
Installation and Weatherproofing
Once the door is built, install it into the opening. Use shims to level and plumb the door, then screw through the jamb into the studs. Check the gap around the door—it should be consistent. Apply exterior-grade caulk to the seam between the jamb and the siding. For the bottom, a drip cap keeps rain from wicking up. If your old house has no sill pan, install one before the threshold to prevent rot.
Seal the door itself with a high-quality paint or stain designed for exterior wood. Two coats on all sides, including the top and bottom edges, prevent moisture from warping the door. This step is often skipped, but it's critical for longevity.
Common Mistakes to Avoid When Making an Exterior Door
Even experienced DIYers slip up. Here are four pitfalls to watch for when you learn how to make an exterior door:
- **Ignoring expansion gaps.** Wood moves with humidity. If you glue panels tight into the frame, they'll crack. Always leave at least 1/8 inch around each panel.
- **Skipping the bottom seal.** A standard sweep isn't enough for an old house floor that slopes. Use a threshold with a vinyl bulb gasket that compresses against the door bottom.
- **Using interior-grade wood.** Pine from the big-box store looks fine but rots fast outside. Spend the extra $50 for cedar or mahogany—your door will last decades longer.
- **Forgetting to pre-drill hinge screws.** Old houses have hard framing lumber that strips easily. Pre-drill with a bit slightly smaller than the screw shank to avoid stripped holes.
Avoid these mistakes, and your custom door will operate smoothly for years.
Final Thoughts
Knowing how to make an exterior door is a valuable skill for any old-house owner. It gives you control over fit, energy efficiency, and security. Your family will thank you when the winter drafts disappear and the door swings smoothly. Start with a simple panel door, and work your way up to a more complex design. You don't need a perfect house—you need a house that is safe, dry, and honest. This project checks all those boxes.
Remember: measure twice, cut once, and always keep a fire extinguisher nearby when working with power tools. If you get stuck, there are plenty of old-house communities online that can help. Good luck!


No feedback yet — submit the first.